For most iPhone owners, it’s an annual September ritual: update your iPhone to the latest version of iOS and take a few days to learn all the new features and capabilities of Apple’s latest mobile operating system. And/or, maybe even get a new iPhone while you’re at it, with the new iOS already installed.
If you’re upgrading to the iPhone 7 (6s or SE), the assumption is that it is from an older iPhone If you’re switching from an Android phone such as the Samsung Galaxy Note 7, you should use Apple’s Move to iOS app to move your data over. You’ll find the app in the Google Play store (ignore the low rating of the app; its seemingly suspicious 2.5 star score is due primarily to low rankings left by Android lovers/Apple haters.)
Backup Your Old Phone
Before you do anything else, connect the phone you’re replacing to your PC and open iTunes. Once in iTunes, tap on the icon for your phone (top left of your screen) and perform a backup to your PC, which will be faster than using WiFi.
Upgrade Your New Phone to iOS 10.0.2
Yes, Apple has already issued two upgrades to iOS 10. And, while you’re at it, make sure you keep your phone upgraded each time Apple issues an OS upgrade. Apple upgrades its iOS to fix periodic bugs, but mostly to close security vulnerabilities that pop-up from time-to-time. iPhones are generally more secure than Android phones, but only if you keep your iPhone current. There are numerous Apple fan sites that regularly report when the company releases a new version of iOS. If you value you and your phone’s security, try and to keep your iPhone OS up-to-date. Your iPhone will perform better and safer if it’s running the most current OS version.
To perform the update, connect your new phone to your computer. The update will download faster from Apple and onto your iPhone when its physically connected via a cable to your PC and iTunes than via Wi-Fi.
Restore Backup to Your New Phone
Click on Restore Backup. How long your restoration will take will depend on how much data you had on your old phone. Even with more than 10,000 music tracks, our Backup Restore took only around 30 minutes.
Replace Your SIM Card
Your phone connects to your carrier’s network via a SIM card, which is placed in a tray in the right side on the iPhone 6s. Depending on where you got your new iPhone, you may need to transfer the SIM card from your old iPhone to your new iPhone. Two things: First, starting with the iPhone 5, Apple went with a smaller “nano” SIM card, so the “micro” SIM card from your iPhone 4 or 4s will be too big for your new phone (here’s a list of which SIM card will fit with which Apple device). Contact your carrier to get a new card, if one wasn’t already included. Second, you’ll need a safety pin or small unwound paper clip to push in the pinhole to pop the SIM card tray out. Be careful: both the tray and the new nano SIM card are REALLY tiny. Perform the switch over a clear counter or table top to avoid misplacing either piece.
Make Sure Your Phone is Activated
Did you buy your new iPhone from Apple or from your carrier? In either event, don’t assume that your new iPhone will immediately work. Sometimes, whomever sold you your phone doesn’t automatically switch the service from the SIM card in your current phone to the SIM card in your new phone. Before you go out and use your phone in the real world, turn off the Wi-Fi and either try to make a call or access the Web. If one or both don’t work, call your carrier to switch the service to your new iPhone. You’ll need your new iPhone’s serial number and IMEI numbers, which are located both on the iPhone box or in Settings > General > About, toward the bottom.
Change the Name of Your New iPhone
When you restore a backup of your old phone to a new iPhone, your new iPhone inherits the old iPhone’s name. In iTunes, when you have the iPhone information on your screen (click the iPhone icon in the upper left hand corner), click on the name of the phone on the top of the contents list on the upper left. When the name is highlighted, you’ll be able to overtype it to replace the old name with a new name of your choice. You may not see the new name reflected on the iPhone itself, however, until you disconnect it from your PC. Also, when you send or respond to an email on your iPhone, each email is labeled by default at the bottom with “Sent from my iPhone XX.” To make sure the “XX” in this line displays your latest iPhone model, go to Settings > Mail > Signature to change what appears beneath each email you send. Or, eliminate the “Sent from my iPhone XX” altogether, and/or replace it with something more personal.
Taking Your Fingerprints
If you’re upgrading from an iPhone 5 or older, you’ll find your new iPhone wants to take your fingerprints during setup. Using your fingerprint – what Apple calls Touch ID – means not having to input that now-longer six-digit code every time you want to unlock your phone and not having to type in your Apple ID each time you want to make an Apple Pay or iTunes purchase.
During set-up, you’ll be prompted to place one of your fingers on the Home button, which doubles as a fingerprint sensor – I use my thumb. Wait for the iPhone to tell you to “Lift Your Finger” and “Place Your Finger” – this will make the process faster and less confusing. After your iPhone set-up is complete, you can add additional fingerprints. My wife and I each put our thumbprint into each of our phones so we both have access.
Hey Siri, it’s me
Siri, of course, is Apple’s sometimes wiseass and sometimes not always helpful personal assistant – although she’s new and improved in iOS 10. With the iPhone 7, you can now simply say “Hey, Siri” from the lock screen to get her attention. This allows you look up facts, dial contacts and more from your lock screen — but not change settings or unlock your phone. If you’re concerned about other people having this type of access to your phone, go into Settings > Touch ID & Passcode and scroll down to turn off access to certain items, including Siri, from the lock screen. Check out our guide to making Siri work better.
Apple Pay
If you’re new to the Apple 7, you’ll be new to Apple’s pay-by-phone system. Since we had Apple Pay already, we only needed to input our card’s 3-digit security number to move the account to the new phone when did a Restore From Backup, so we’re not sure if you’ll be prompted to add a card to Apple Pay during the initial setup if you’re upgrading from a 5 or 5s, or even a (gulp!) iPhone 4. Our advice if you’re new to Apple Pay: whenever you encounter it, skip the Apple Pay setup until after your iPhone is operational. The process is relatively painless – you just use the phone’s camera to capture the information on your card (it’s kind of cool, actually) – but you probably just want to get your iPhone working normally first.
Additional Set-up Tips
Once your iPhone tells you it’s ready to go, you’ll still have some setting up to do so your iPhone runs smoothly. Continuing with the items below:
Change your Lock Screen Notifications
From the lock screen, slide the screen to the right, and a brand new notifications panel appears. There you will find widgets that pull information from your calendar, the weather app and nearby local transit information and news, among other information. You’ll want to scroll down to the bottom where it says Edit to select which widgets run on your lock screen.
The information in regular notifications — calls, texts and so on — is now more in-depth and interactive. You can now read and respond to text messages, among other tasks, even from the lock screen. That also means these things are easier for someone else to access. If you want more privacy, adjust the amount of information that appears for each notification and whether the app delivers lock screen notifications at all by going to Settings > Notifications. There, you can select settings for each app.
You may also want to restrict what can be accessed when your phone is locked. Go to Settings > Touch ID & Passcode, and you’ll see a list entitled Allow Access When Locked. Here, you can toggle on and off access to Today View (those widgets), Notifications View, Siri, Reply with Message, Home Control and Wallet. Home Control, a new feature of iOS 10, lets you control devices like smart lights and other smart home devices. For each of these, you’ll need to weigh your privacy versus convenience.
Automatic App Updates
Since Apple apps are all carefully curated to remove unwanted malware and spyware, there’s no reason to manually update apps as you do on an Android phone. That’s why Apple let’s you automatically update apps in the background – but you have some choices to make. Go to Settings > Apps and iTunes Stores and turn on Updates for Automatic Downloads. If you have a small data plan, make sure you toggle Use Cellular Data to off.
Go to Settings-General-Background App Refresh – it should be at the bottom of the first screen you see – and choose the apps you want automatically updated.
Background App Refresh
iPhone can automatically update your apps in the background, when they’re not actively running. If your data plan is minimal, you may not want your apps to automatically update unless you’re actively using them. To turn off background app refresh, go to Settings > General > Background App Refresh (9 items down) to turn on or off background app refresh for all apps, or allow access for each app on a case by case basis.
Wi-Fi or Cellular App Connectivity
You also have an option about how your apps connect to the Internet when you’re actively using them. Go to Settings > Cellular (4 items down) and scroll down to see a list of apps. Turning on an app allows it to connect via cellular, turning it off means that app will connect only via Wi-Fi. For instance, you don’t want to inadvertently start watching a movie on Netflix when there’s no Wi-Fi and burn through your monthly data allotment in two hours.
Sometimes the Wi-Fi connection isn’t what it ought to be so, at the bottom of the list, you can choose to let a cellular connection help out Wi-Fi for those apps you really need to have access to the net. If you have a limited data plan, you’ll want to be careful here. You may find yourself burning through data quickly at home, when you think you’re just using Wi-Fi.
Wi-Fi Calling
If you get spotty reception at home or another location you frequently visit, you’ll want to turn on Wi-Fi calling to ensure your calls come through. Go to Settings > Phone > Wi-Fi Calling. There you can choose to turn on the feature. You’ll be prompted to enter your emergency address, which should be the address where you’ll be using Wi-Fi calling
Set up People Identification
Among the myriad new iOS 10 features is photographic face detection and the creation of a People album in Apple’s Photo App. Once you get your phone updated, go to the Photos app and tap the People folder. You’ll be able to create folders for faces you photograph frequently, and any subsequent photo with that face will appear in the correct People folder (at least theoretically), a really handy way of fast finding favorites photo with frequently photographed faces. Finally.
Buy More Lightning Headphone Adapters
Attach the included Lighting-to-3.5mm adapter to your favorite headphones. Immediately. You don’t want to grab both your new iPhone and your old headphones, only to find yourself out-and-about without a way to connect them. Then, go and buy one or two additional headphone adapters ($7.90 on Amazon), and put them in a bag you always carry or your car where it’ll be handy, just in case. Next month, Belkin is due to release its Charge RockStar ($39.99), a dual Lighting jack accessory that will enable you to listen and charge – or connect two Lightning headphones – simultaneously. Given the iPhone’s lack of a 3.5mm headphone jack, we expect to see a lot of similar adapters.
Your new iPhone is filled with features and options to customize your\ phone experience. For instance, you can turn on a low-power mode to ensure your phone doesn’t poop out just when you need to make an emergency call, enable Night Shift to reduce the amount of blue light exposure at night or turn on a Do Not Disturb” mode to keep your phone quiet when it’s on the nightstand and you’re trying to sleep (all by swiping up from the bottom of any screen to reveal the control panel). So take the time to explore the many settings in “Settings” to discover everything your new iPhone can do.
By Stewart Wolpin for techlicious.com
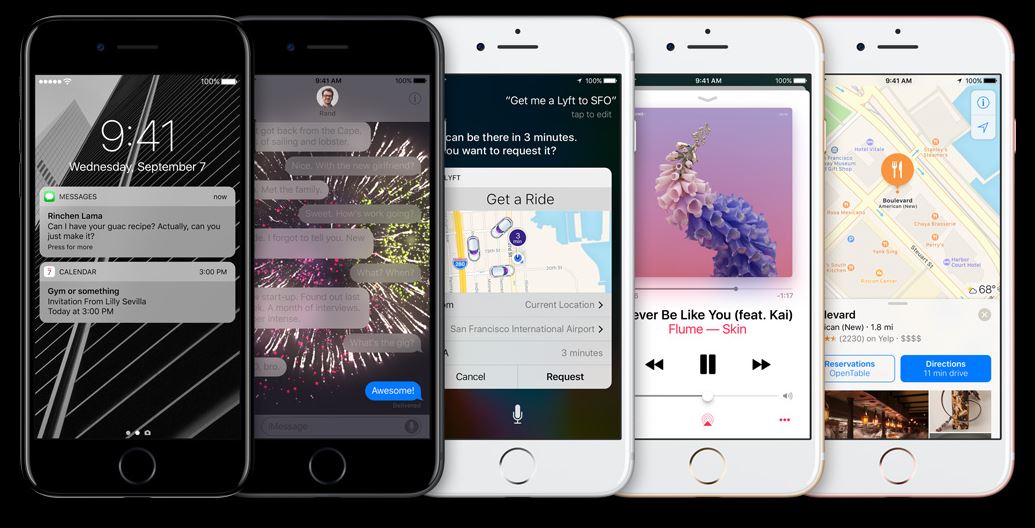
Photo Credit: Apple
0 Comments